Showing posts with label recipes. Show all posts

October 7, 2021

For Eggplant Lovers: Fried Eggplant Patties


It's been a very long time since I posted a recipe on this blog. But during the summer I fell in love with a recipe from Marcella Hazan's Essentials of Classic Italian Cooking, so I wanted to share it. I had a huge crop of eggplants this past summer, and Hazan's "Eggplant Patties with Parsley, Garlic, and Parmesan" was an delicious way to use them. 


I did change one aspect of the recipe: in her instructions, Hazan tells us to bake whole eggplants in a 400º oven until tender, about 40 minutes. When I first tried this recipe a year or two ago, that's how I cooked the eggplants and the result, to me, was ho-hum. Instead, I decided to cook the eggplants over an open flame on the stove until they were soft and blackened, as I've cooked them for eggplant salad, recipe here. The result is a deep, smoky flavor that adds tremendous richness to the patties. 

  • About 2 pounds eggplant
  • 1/2 cup unflavored bread crumbs (I use Panko)
  • 3 Tbs parsley, chopped fine
  • 2 garlic cloves, chopped very fine (I like lots of garlic; my home-grown cloves are huge)
  • 1 egg
  • 3 Tbs freshly grated parmigiano-reggiano cheese
  • salt
  • freshly ground black papper
  • Vegetable oil
  • Flour, spread on a plate
1. Cook the eggplants over a direct flame on the stove, turning them until they are charred all over and easily pierced with a two-tined fork.
2. When cool enough to handle, slip off skins, cut eggplant in large pieces––I also remove any large, hard masses of seeds––and place in a colander to drain, at least 15 minutes. You can gently squeeze the eggplant to help it release moisture. 
3.  Finely chop the eggplant and combine in a bowl with bread crumbs, parsley, garlic, egg, parmesan, salt, and pepper. Mix thoroughly. 
4. Shape into small patties around 2 inches wide and 1/2 inch thick. Smaller patties give a crispier result. 
5. Put enough vegetable oil in a skillet to come 1/4 inch up the sides (Hazan recommends 1/2 inch, but I use less), and turn the heat to high. When the oil is very hot, turn the patties in the flour on both sides and put into the pan; don't crowd them. When they're nicely browned on one side, turn them. When done, drain on a paper towel-lined pan or plate.  Serve hot or lukewarm.

Enjoy! this makes a lot of patties; the recipe says it serves 4 to 6. I heat my leftovers by putting them in a hot skillet, which maintains the crispmess. 

And if you're interested, another of my favorite ways to prepare eggplant is frying the slices,  I eat them in a pita bread sandwich, recipe here, or use for a pasta sauce with tomatoes, recipe here. 


September 9, 2021

The Vegetable Garden: Aesthetic and Gustatory Pleasures


I love my vegetable garden. What could be more wonderful than bringing a basket of just-picked vegetables into the house for a meal? It's not just the taste that is important––you'll never buy a potato as good as one that's homegrown––but there is also the act of planting a seed, then watching the seedlings emerge, grow, and bear fruit. Even after almost 30 years of raising vegetables in this place, it still seems a magical process. It's a process of hit and miss––some years a great eggplant crop, another year hardly a one; sometimes insects go on the rampage––but there are always enough successes; it's a process of hope. As Margaret Atwood wrote:
Gardening is not a rational act. 
And May Sarton, in At Seventy: A Journal:
A garden is always a series of losses set against a few triumphs, like life itself.


Although I've mostly given up on my flower borders, concentrating my energy on growing vegetables, I do plant some flowers amongst the the food crops. It's a delight to look out at my garden and see towering sunflowers, adding good cheer to the scene. These are Lemon Queen, and this plant grew to 8 feet tall this summer. But it's not just the sunflowers that I find beautiful; each vegetable plant has its own aesthetic qualities. Corn tassels pointing into the air are like delicate waving fingers.


A sweet pepper plant shows off its dazzling fruit, lovely to see, and to taste. 


Lettuces, with leaves of various shapes radiating from a center, are as beautiful as floral bouquets. 


Red cabbage, a grand leafy vegetable, has gorgeous leaves surrounding a stunning volleyball-sized center. 


I feel so much satisfaction in looking at my harvested crops. They are a reward of hard work, and I'm happy just contemplating them before eating. These three melons are grown from seed from Fedco Seeds, and are: on the left Alvaro, a Charentais melon; behind is a honeydew, White Honey; and on the right is a delicious hybrid, Sensation. Each of these has a different flavor, and they taste nothing like supermarket melons; oh, they are so much more delicious! 


The eggplants were very happy this year, probably because of the early heat spell that we had. I love eggplant, and it's a treat to have fresh ones to cook. Two food favorites: fried eggplant sandwiches, and eggplant salad, both family recipes. Click on the links for the recipes. The fried eggplant link has a bonus of a recipe for homemade pita bread. 


Sungold cherry tomatoes glow on the vine. They are so delicious that I stand and eat them in the garden, popping one after another into my mouth, so they rarely make it into the house. But I can recommend a way of cooking them: toss with olive oil and sauté in a pan until soft and caramelized; simple and quite tasty. 


Another vegetable that barely makes it out of the garden to a plate is corn. The kernels are so tender and sweet that cooking isn't necessary. What a pleasure to stand out in the sun, admiring the plants around me, while eating an ear of corn.


Winter squashes are like hidden gems, nestled under rampant foliage.


Preserving crops is an important part of gardening. Many of my crops will feed me through the winter into next spring. I make jam: rhubarb in the spring, blueberry and raspberry in early summer, and here: green tomato jam––recipe at the link––which is similar to a marmalade. 


I'm grateful for summers with abundant tomatoes, so I'm able to can, and to freeze sauce. I know I sound like a broken record, but home-canned tomatoes are so much more tasty than even the best canned tomatoes you can buy. I favor Juliet paste tomatoes for these purposes. For fresh eating I grow a variety of heirloom tomatoes.


I hang some crops to dry in the mudroom, here oat straw––which I'll cut into small pieces and use for tea––and garlic. "Awe", a perfect sentiment in regards to vegetables, is the top of a Bread and Puppet poster. 


Also in the mudroom are onions, with a Karl Blossfeldt photograph at the lower right, an image of gourd squash stems.


Finally, a peak inside my chest freezer, which is getting packed to the top with summer produce. You can see broccoli, green beans. zucchini, corn, whole green peppers for stuffing at the upper right, and some homemade bagels (these aren't from the garden; I don't plan to grow wheat). In addition to these ways of saving vegetables, I also have a root cellar where I keep carrots, beets, potatoes, and cabbage once the weather has cooled. 

I think about the winter ahead with satisfaction, when I can ruminate on what I'll eat for lunch or dinner and know that an abundant variety of vegetables is at hand. The pleasure goes beyond good food, into a feeling of life well lived. 


April 1, 2021

Matzoh, Tradition and Commemoration


There are many foods that I eat in season––asparagus in the spring, tomatoes in summer, brussels sprouts in the fall––but only Passover matzoh is so rich in associations. The Jewish holiday of Passover commemorates the Exodus from Egypt, where Jews were enslaved for 400 years. Because they didn't have time to make raised bread in leaving Egypt, their bread was unleavened, so unleavened matzoh became a ritual food during the 8 days of Passover. For me it's also a tie to family, to our holiday traditions. I love the large family seders, sadly missed the past two years because of Covid. 


I look forward to my breakfasts of matzoh cereal, invented by my father (or are there any other people out there who make this?)  I remember him sitting at the breakfast table, chopping at his cereal. Just crumble two matzohs into a bowl, sprinkle generously with sugar, and pour on plenty of milk. My brother informs me that he has two bowls of this every morning, with lots of sugar. Not very nutritious, but good nonetheless. This is food as remembrance.


Another commemorative food eaten for the Passover seder is Haroseth, symbolic of the mortar that the Israelis enslaved in Egypt used in buildings for the Pharaoh. In my Sephardic community, we make it with dates rather than apples. For me it's a treat spread on matzoh, and is quite simple to make; it can also be thought of as date butter: 
Soak one pound of dates (I use medjool dates) in 1 1/2 cups of water for 1 hour. Bring to a boil and simmer for about 45 minutes until soft and breaking down. Drain the dates; when cool you can slip off their skins, then process them until smooth in a food processor.


My final Passover matzoh treat is matzoh brie––a kind of fritter––another very simple recipe. 
Run cool water over two matzohs until they soften, then crumble them into a bowl. Beat with two eggs and a little salt. Shallow fry them with vegetable oil, butter, or a combination of the two; I use oil. Top with something nice: I like the tart-sweet flavor of rhubarb jam on mine. You can also add a little grated onion for a savory fritter. 

Having food traditions that tie us to history and to family add richness to life. 


March 30, 2021

In the Early Spring Vegetable Garden

Egyptian Onions, aka Walking Onions


I love seasons: with each change comes the excitement of the new. Even though spring is the same year after year, it feels as though it's never happened before. As soon as the garden is dry enough to walk through without sinking into mud, my first chore is to go out with a bucket of small stakes and a tape measure and mark out the rows. I am thrilled to watch the new growth, and especially gratifying with food crops. One of the first plants I can harvest are Egyptian onions, which I snip and add to salads and other dishes. Today I added some to my lunchtime coleslaw, using a cabbage that I harvested last fall. 


Garlic


Garlic bulbs are planted in the fall, and I cover them with a hay mulch. In early spring, I gently move aside the mulch to see if the shoots have emerged. It's an announcement of the start of garden season when those green leaves rise up.


Sorrel


The tiny leaves of sorrel have begun to grow. There are several recipes that I love that use sorrel; I'm fond of its tart flavor. There's a sorrel/onion tart, cream of sorrel soup, potato-sorrel soup.


Chives


Chives are another handy herb to have in the garden.


Cold Frame


My hand-made cold frame is rather rickety and crude, but it does the job asked of it. When the soil dries enough to plant, my first sowing of seed is arugula and lettuce in the cold frame. They are very hardy, and the structure keeps it warmer inside to encourage growth during these cool days.

Arugula seedlings


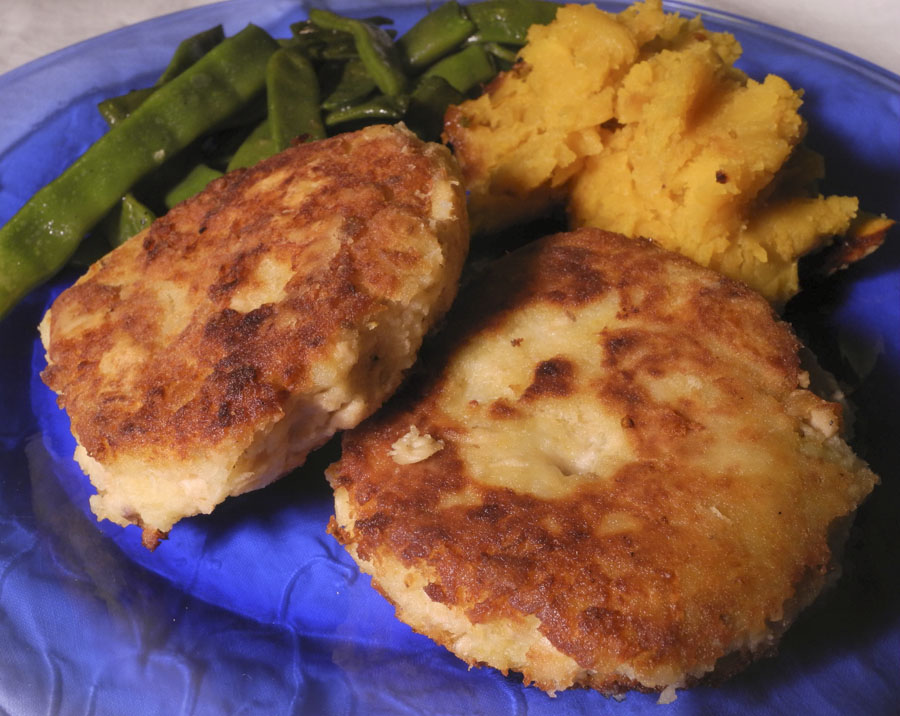
And today I was so happy to see some tiny new arugula seedlings popping up, from a March 24th planting. 


Pea Stakes


I'm getting ready to plant peas: the stakes are placed, and next I'll put up the fencing, for which I use chicken wire. The three taller stakes––with added height from taped-on broom handles––are for snap peas, which are vigorous climbersl. I love the description for planting peas and spinach: "as soon as the ground can be worked". A handful of soil, squeezed between the fingers, should break apart when your hand is opened and not stick together in a muddy clump. A too-wet soil will rot the seeds. 


Rhubarb

Rhubarb plants grow to an enormous size so are situated outside the perimeter of the garden. Although we treat rhubarb as a fruit, it's actually a vegetable, so is appropriately included in this post.  What I most love to make with rhubarb is jam, deliciously tart and sweet. 

The first spring vegetable that will appear will be perennial asparagus, but I have to be patient until early to mid May before that tasty treat appears. I have to admit that I've let my flower gardens go to rack and ruin, letting the plants fight it out with the weeds, but my vegetable garden gives me such deep satisfaction that I hope I never have to give it up. 


March 17, 2016

Mandelbrot: the Jewish Biscotti


I love having some cookies in the house to have with my afternoon tea; a little bit of sweet energizes me for the rest of the day and evening. This recipe, from Claudia Roden's The Book of Jewish Food, is my favorite for this purpose: the cookies have some sweetness to them, but it's not overpowering, they are not too rich, and the texture is nicely crisp but not hard. The term biscotti means "twice baked". The Wikipedia entry says biscotti originated in the city of Prato and traditionally they also have almonds, just as mandelbrot, "almond bread", does; I don't know how the two are related. The Jewish version has more oil than biscotti, so is a little more cakey and less dense. The recipe is pretty simple and makes 3 or 4 dozen cookies. They keep very well in a tight container, but I freeze most of them and just take out several at a time. It's also nice to have a little treat in the house if a friend happens to stop by. 

Mandelbrot

3 eggs
3/4 cup sugar
1 cup vegetable oil
grated zest of one lemon
grated zest of one orange
a few drops of vanilla extract
a pinch of salt
1 Tbs baking powder
3 3/4 cups flour
1/2 to 1 cup blanched almonds (I use 1 cup)
1 egg yolk to glaze. 


  • Beat the eggs with the sugar to a pale, thick cream. Add the oil, lemon and orange zest, vanilla, salt, baking powder and beat to a light emulsion.
  • Blend in the flour, then work in the blanched almonds. 
  • Oiling your hands so they don't stick, form the dough into two long logs, about 3 inches wide, leaving space between them. I use parchment paper rather than oiling the pan. It is clean and convenient. 
  • Brush with egg yolk (I didn't do that for this batch....lazy me).
  • Bake in preheated 350º oven for 30 minutes or until lightly browned. 


  • Let the logs cool, then cut into diagonal slices about 1/2 inch thick. 
  • Arrange on baking sheets, cut side down, and bake in preheated 400º oven for about 10 minutes, or until lightly browned.
  • I turn the cookies over to brown the other side, for an additional 5 or 10 minutes. 

Enjoy!


January 18, 2016

Orange and Almond Cake, "Tarta de Naranja"


An intense orange flavor combined with the texture of ground almonds makes this cake a delicious treat for a winter's day. The recipe comes from Claudia Roden's Mediterranean Cookery; she writes that the recipe came from a Spanish travel companion. It is a flourless cake, consisting of only almonds, eggs, sugar, and orange zest; it is then impregnated with an orange syrup, so it becomes very very moist. It's quite simple to make, the only complication being separating the eggs and beating the egg whites till stiff. The cake was a hit at my art group yesterday.

4 eggs, separated
125 g (4 oz) sugar (note: I always used a kitchen scale for measuring, so I looked up the equivalent in cups: it's about 1/2 cup)
grated zest of one orange
50 g (2 oz) ground almonds
50 g (2 oz) blanched almonds, finely chopped (2 oz equals 2/5 cup, so a little more than 1/3, a little less than 1/2 cup)

For the syrup:
Juice of 3 or 4 oranges, equaling about 300 ml, or 10 fl oz)
75 g (3 oz, 3/8 cup) sugar
1 cinnamon stick
1 Tbs orange liqueur (optional; I add the zest from 1/2 orange for more flavor instead of the liqueur)


  • Preheat oven to 350º
  • Mix egg yolks with sugar, orange zest, and all the almonds.
  • Beat egg whites till stiff; fold gently into the egg yolk mixture. 
  • Pour mixture into a greased and floured non-stick 8 inch cake pan. 
  • Bake for 30-35 minutes, until lightly browned. The recipe calls for 45 minutes, but that's much too long, at least in my oven. The cake will puff up in the oven and sink back down as it cools.
  • Allow the cake to cool, then transfer it to a serving dish.
  • For the syrup, simmer the orange juice with the sugar and cinnamon stick (and orange zest if using) for a few minutes until the sugar is melted. Add the liqueur if using. 
  • Prick the cake with small holes, for instance using a toothpick, then pour the syrup over it. It takes a while for the syrup to really sink in. Roden suggests eating the cake the day after it is made, which is what I've done. 

Serves 6-8 hungry people, or 8-12 with smaller portions, which I think are quite sufficient.

Enjoy!


For my newer readers, here's a link to more of the recipes on this blog.

October 9, 2015

An Autumn Treat: Roasted Brussels Sprouts with Garlic


I have a bumper crop of Brussels sprouts this year, and I love going out to the garden to snap some off the stem for dinner. I usually just steam them and eat them with a little butter, which is delicious, especially after the sprouts have been sweetened by frosts. But last week I was in the mood for something different, so I went looking for new recipes. I found this scrumptious and simple recipe from Mark Bittman at the NY Times. The sprouts are first browned in a cast iron frying pan and then put in the oven for finishing. A cast iron pan is important so it can go from stove top to a hot oven (I have four, in different sizes). If you don't have cast iron, or a pan that can go in the oven, you can brown the sprouts in a pan then transfer them to a baking dish of some sort. 
The recipe notes that it serves 4, but the way I eat, with vegetables as the entree, it made 2 servings. I had these yummy sprouts last night with a big pile of Spicy Indian Potatoes, and it was a very satisfying meal.

Mark Bittman's Roasted Brussels Sprouts with Garlic:

1 pint Brussels sprouts, about 1 pound
4 to 6 Tbs extra virgin olive oil, to coat the bottom of the pan
5 cloves garlic (the garlic I grow has huge cloves, so I use 2 or 3 and cut them in pieces)
salt and pepper
1 Tbs balsamic vinegar (I forgot the vinegar last night and the sprouts were delicious)

  • Preheat oven to 450º
  • Trim bottom of sprouts, and slice in half from top to bottom
  • Heat oil in pan until it shimmers; put in sprouts cut side down in one layer, add garlic, sprinkle with salt and pepper.
  • Cook, without turning, till sprouts begin to brown on the bottom, then transfer the pan to the oven. 
  • Roast in oven, turning occasionally, for about 15 minutes, until the sprouts are tender and nicely browned. (Bittman says to cook for 1/2 hour, but when I did that the vegetables were burnt, so I'd start at 15 minutes, and check them.)
  • Taste, and add more salt and pepper if needed. Stir in the balsamic vinegar and serve hot or warm.


August 19, 2015

A Spread for Bread: Spicy Chick Pea Puree


When I have friends over for a meal I like to set out some appetizers; since I always have some good home-made sourdough pain de campagne on hand–, (you can see the recipe here), spreads for it are usually on the menu. I've shared my recipes for a roasted pepper spread and carrot/potato appetizer here; in this post I add to the possibilities with Deborah Madison's Spicy Chickpea Puree, from her great cookbook Vegetarian Cooking for Everyone. It is similar to a hummus, but without the tahini. This is a delicious, simple recipe, for which I always keep a couple of cans of chickpeas in the house. When I make any recipe calling for whole chickpeas, I cook the dry beans for better texture and flavor, but being that this is a puree, the canned beans work fine. The recipe calls for using spice seeds, but if all you have are the ground, that's fine too.

1 teas cumin seeds
1/2 teas coriander seeds
1/4 teas fennel seeds
1 or 2 cloves garlic
salt
1/8 to 1/4 teas cayenne
1 1/2 cups cooked chickpeas
2 Tbs olive oil
1/2 cup cilantro leaves (when I make this in winter, I don't have cilantro from the garden, so I leave them out, and it's still delicious)
juice of 1 lemon

Toast the cumin, coriander, and fennel seeds in a small skillet over low heat, shaking pan often, until the aroma rises. Remove them from the pan to cool.

In a food processor or blender, coarsely chop the garlic, 1/2 teas salt, cayenne, oil, and cilantro, with 1/4 cup water. Add the spices, chickpeas, and lemon juice and puree until smooth.

Enjoy!

July 29, 2015

A Delicious Middle Eastern Mashed Zucchini Salad


In the spring and early summer, I love eating salads of mixed lettuces and arugula, but once it turns to full summer, I turn to various salads made with vegetables: green beans, beets (a Middle Eastern recipe here), tomatoes (of course!), potatoes (recipes for two potato salads, Italian and Middle Eastern here), carrots, salads of beans with vegetables (a recipe for a salad of black beans and peppers here). A zucchini salad that I enjoy making, because of its wonderfully spicy flavor, is this one from Claudia Roden's The New Book of Middle Eastern Food, a great cookbook. I picked my first zucchini from the garden to today, and in their honor, made this salad for lunch. It's quite simple to prepare: just boil the zucchini, mash it, and add the other ingredients.

Claudia Roden says this serves 4-6, but that's only if you have tiny portions. I think it's good for 2 or 3 servings. Of course it would be easy to double the recipe.

1 lb zucchini
juice of 1/2 lemon, or more
3 Tbs olive oil
1/2 to 1 teas harissa. I don't have this ingredient, so added a bit of cayenne to the salad. You can add it according to your taste.
salt to taste
1 or 2 cloves of garlic, crushed
1/2 teas ground coriander
1/2 teas caraway seeds

  • Cut off ends of zucchini and cut into large pieces. Boil in water for 10 or 15 minutes until very soft.
  • Drain and mash in a colander so extra water will be pressed out.
  • Beat the rest of the ingredients together and mix with zucchini in a bowl. (I just added them directly.)
  • Serve cold, and enjoy.


July 9, 2015

Strawberry Muffins


It's strawberry season here in northern Vermont. Along with strawberry shortcake, a recipe I love is this one for strawberry muffins, which came from a container of Stonyfield Farm yogurt. Using yogurt instead of milk adds extra flavor to the muffins. I usually freeze some chopped strawberries so I can make these during the winter. The same recipe works well for blueberries or raspberries (I'd much rather have a raspberry muffin than a blueberry one).

1 cup all purpose flour
1 cup whole wheat flour
1/2 cup sugar
1 1/2 teas baking soda
2 eggs
1 cup yogurt
1/4 cup butter, melted
1 teas vanilla
1 cup chopped strawberries

Preheat oven to 375º.
Mix flours, sugar, and baking soda in a bowl.
In another bowl, beat eggs, then mix them with the yogurt, melted butter, and vanilla.
Toss the strawberries in the flour mixture, then pour liquid ingredients into the flour and blend.
Spoon batter into greased muffin tins: 12 for smaller muffins, 10 for larger (I prefer fewer larger muffins).
Bake for 20-25 minutes, until top is golden and batter is cooked through.


January 24, 2015

Delicious Salmon (or Vegetable) Cakes


I love simple recipes, of course delicious ones, and healthy adds another plus to the equation. Although I have previously shared only vegetarian recipes, in keeping with the "garden" theme, these fish cakes by Jamie Oliver fit the requirements of taste, ease, and health. Instead of bread crumbs as a binder, Oliver suggests mashed potatoes, a lovely idea. I use canned salmon, which makes the preparation very easy, and it's a great way to get our Omega-3s. Here I'm going to do a little preaching: I buy only wild salmon although it costs more. Farmed salmon are fed an unnatural diet, are given antibiotics, and pollute the waters they are grown in. According to this article from EcoWatch, fish farming is becoming more environmentally responsible, but I'll still hold off and stick with the wild fish. Another nice thing about this recipe is that Oliver points out that since the potatoes and egg act as a binder, you can substitute any cooked vegetables or other ingredients for the fish in this recipe. The recipe serves 4 according to Oliver, but only two according to me; well, I did use a smaller amount of fish, but no wonder I'm gaining weight this winter!

10 oz Yukon gold, russet, or other mealy potatoes (I use my favorites from the garden, Carola)
2 x 3 3/4 oz cans salmon (my can of wild salmon was 6 oz, so I used a smaller amount of potatoes)
a small bunch of fresh parsley (I left this out, not having any)
1 large egg
2 lemons
all purpose flour for dusting


  • Peel the potatoes, and chop in even sized chunks. Boil under cooked, then mash and allow them to cool.
  • Chop the parsley, zest one lemon.
  • When the potato has cooled, add the salmon to it. Add the egg and parsley and lemon zest and mix well; season with salt and pepper. 
  • Divide the mixture into four, then form into patties about 3/4 inch thick. Dust with flour and place on a floured plate. Put into the refrigerator for about an hour to firm up. This is a really helpful hint; cooling the patties makes them much easier to cook without falling apart. 
  • Heat some olive oil in a wide skillet. When hot, add the patties and cook about 3 - 4 minutes on a side, until richly golden and crisp.
  • Enjoy with a sprinkle of fresh lemon juice.  

November 26, 2014

Potato Leek Gratin: More Than the Sum of Its Parts


Cooking is often like alchemy: ordinary ingredients become magically transformed into heavenly tastes. The first time I made this recipe, a Potato Leek Gratin from the New York Times, I thought it was so delicious that I ate nearly half of a recipe for 6 people. I had been searching for a recipe with potatoes and leeks, and couldn't have been more pleased with this one. I realize that I'm sharing it a little late for inclusion in Thanksgiving dinner, but it's not difficult to prepare and will work for a special or everyday dinner. 


Potatoes in dish


2 Tbs unsalted butter, plus more to grease the dish
2 large leeks (I used 4 small ones) trimmed and halved lengthwise
1 1/2 lbs peeled Yukon Gold potatoes (I used a similar variety that I grow: Carola)
1 teas salt
1/2 teas pepper
2 thyme sprigs
1 cup heavy cream
1 fat clove garlic, finely chopped
1 bay leaf
1/4 teas ground nutmeg
3/4 cup Gruyere, grated (I used cheddar)

1.Preheat over to 350º. Butter a 2 quart gratin dish (I didn't have a large enough dish so used a souffle dish, which meant the potatoes were piled more thickly so got less crispy.) Wash leeks to remove any dirt and slice thinly.

2. Using a sharp knife or mandoline (I used a very thin, 2mm, blade with my food processor, which made the slicing easy work) slice potatoes 1/8 inch thick. Toss them with 3/4 teas salt and 1/4 teas pepper. Layer the potatoes in a gratin dish.

Leeks added to the dish

3. Melt the 2 Tbs butter in a large skillet over medium heat. Add leeks, the rest of the salt and pepper, and the thyme. Cook, stirring, until the leeks are tender and golden, 5 to 7 minutes. Discard thyme and place leeks over the potatoes.

4. Add cream, garlic, and bay leaf to the skillet, scraping up any bits of leeks sticking to the pan. Simmer gently 5 minutes, stir in nutmeg.

5. Pour the cream over the leeks and potatoes. (there's nothing in the recipe to suggest removing the bay leaf, but I remove it.) Top with the cheese. Cover with aluminum foil and bake for 40 minutes. Remove the foil and bake for an additional 15 -20 minutes, until the cheese is bubbly and golden. Cool a bit before serving.


I hope you all have a wonderful Thanksgiving holiday. Although there's much that's wrong with the world today, I know that I have so much to be thankful for, and I hope that you do too. 


November 5, 2014

A Delicious Apple Cake


It's apple season: the farm and orchard stands have shelves lined with bags full of all kinds of apples. Last year, when I had a huge bounty of apples from my antique orchard (this year they are resting, so no apples) I looked around online for a good apple cake recipe. I was lucky to find a wonderful recipe for Mom's Apple Cake from the site Smitten Kitchen. The recipe comes with a charming story about its origin, which you can read at the link. I passed the recipe on to my mom, who also liked it. This year I used Macouns, which are my favorite eating apple, while the recipe calls for McIntosh. This is a very large cake, making at least 10 servings, or maybe 8 if people are ravenous.


Smitten Kitchen's Mom's Apple Cake

6 apples
1 Tbs cinnamon
5 Tbs sugar

2 3/4 cups flour
1 Tbs baking powder
1 teas salt
1 cup vegetable oil
2 cups sugar (I use a bit less)
1/4 cup orange juice
2 1/2 teas vanilla
4 eggs

Preheat oven to 350º. Grease a tube pan. Peel, core, and chop apples into chunks, then toss them with the cinnamon and sugar.

Sift flour, baking powder, and salt together into a large bowl. In a separate bowl, whisk together oil, orange juice, sugar, and vanilla. Mix the wet ingredients into the flour mixture, then add eggs one at a time, beating after each one until the batter is smooth and well blended.

Pour half the batter into the tube pan. It won't look like much, but it expands a great deal in baking. Put half the apples over the batter, then the rest of the batter on top of the apple layer. The remaining half of the apples goes on top. Bake for about 1 1/2 hours until a knife tests clean; the apples will get deliciously caramelized.


This cake looks a big more disheveled than I'd like, and I'm going to tell on myself as to how I can do some dumb things in the kitchen. The tube pan that I have, given to me by my mother, has 3 metal tabs sticking above the rim so that you can put it upside down on the counter to let a sponge cake cool. So silly me (I didn't do this foolish thing last year) turned this cake upside down to cool. Of course, when I went back into the kitchen 15 minutes later, half the cake had fallen onto the counter. I tried to carefully put it back together using a spatula, then stuck it back in the oven for a few minutes, hoping that might be a kind of gluing process. It didn't really work: the cake fell a bit apart when it was cut, but it was still very delicious. I'm sure you'll enjoy it if you try this recipe; and thanks to Smitten Kitchen.


September 5, 2014

Peppers, and Carrots and Potatoes: Spreads for Bread


It's the time of the garden season when I feel almost oppressed by all the produce coming out of the garden. I've been freezing corn and broccoli and zucchini and swiss chard and peppers and tomato sauce; I've been canning tomatoes. I've been eating lots and lots of vegetables; I have to eat my way through 7 heads of cauliflower––which are early and luckily not all ripening at once––because I don't like frozen cauliflower. (See my post "Cauliflower, Four Ways") I'm always looking for new ways to prepare vegetables, so when I had lunch guests this week I pored through Deborah Madison's Vegetarian Cooking for Everyone's chapter on appetizers and found a delicious roasted red pepper spread. I also made a carrot and potato appetizer from Claudia Roden's Mediterranean Cookery. These two favorite cookbook authors never disappoint. 


Roasted Red Pepper Spread

1 large red bell pepper, roasted
1 garlic clove
1 Tbs extra virgin olive oil
a few drops of red wine vinegar
salt and freshly groung pepper

I roast the pepper over the flame on top of the stove, turning it until it is blackened and soft; then I scrape off the black skin and remove the stem and seeds. 
Drop the garlic into a food processor while the blades are running, then add the oil and pepper; process until fairly smooth. Or you can use a mortar and pestle. Then add vinegar, salt, and pepper to taste. 


Carrot Potato Appetizer

1 1/2 lb carrots
1 lb potatoes
salt
2 garlic cloves, chopped
4 teas cumin
3 Tbs olive oil
2 Tbs red wine vinegar
large pinch of cayenne

Peel the vegetables and cut into pieces, the carrots smaller than the potatoes because they take longer to cook. Put them in a pan with the salt and garlic and water to cover; boil until soft.
Drain, mash, and stir in the rest of the ingredients. 


July 30, 2014

Delicious and Simple: Raspberry Cream Tart


The raspberry patch is coming in gangbusters right now. I've been picking and eating, freezing berries for winter eating, and yesterday I made my first batch of raspberry jam, recipe here, and a Raspberry Cream Tart. I like this tart so much that I was sure I'd posted the recipe before, but I haven't, so I'm sharing it now. It is from a cookbook that I've had for many years, and which contains some favorite recipes, Florence Fabricant's Pleasures of the Table. The recipe is indeed simple if you are someone who isn't daunted by making pie crust.


Sweet Tart Pastry for 9 inch tart

1 1/4 cups flour
pinch of salt
2 Tbs sugar
5 Tbs cold unsalted butter, diced
1 egg yolk
3 Tbs ice water (approximately)


  1. Preheat oven to 425º. 
  2. Combine flour, salt, sugar in a bowl. Cut in the butter until it's in very small pieces.
  3. Beat egg yolk with the ice water, and add gently to the flour to form a dough. 
  4. Place in removable bottom tart pan, tucking excess under the edges. The dough should be about 1/4 inch above the rim. 
  5. Freeze the shell until firm, then bake until very lightly browned, around 10-12 minutes. Check on the tart while baking and prick any bubbles that arise. Remove from oven and reduce the heat to 350º


The Tart

2 cups fresh raspberries (the recipe calls for 1 1/2 cups but I think it needs more)
4 -6 Tbs sugar
2 eggs
1/2 cup ground blanched almonds
3/4 cup confectioner's sugar
1 cup heavy cream


  1. Mix the berries with the sugar, using more or less depending on their sweetness. Spread them in a single layer on the bottom of the tart shell
  2. Lightly beat the eggs with the almonds, confectioner's sugar, and heavy cream. Pour over the raspberries.
  3. Bake in a 350º oven until lightly browned and golden, about 45 minutes. 
Enjoy!